Study notes
Container
Runnable instance of a container image isolated from other containers.
Container image
Contains the container filesystem and everything necessary to run the application including dependencies, environment variables, default command to run when start the container and other metadata.
It is a read-only template with instructions for creating a docker container.
An image can be based on other images, ie. it is based on unbutu but contains Apache.
To create an image, it is necessary the Dockerfile(contains steps to create the image and run it)
Containerize an application
Set the getting-started app.
1. Get the app
Clone the getting-started repository using the following command
git clone https://github.com/docker/getting-started.git
In VS code you have
2. Build the app’s container image
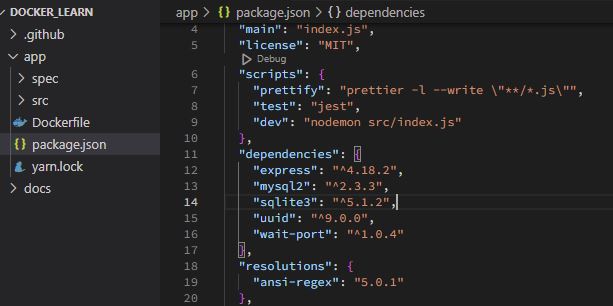
Create Dockerfile in /app folder.
# syntax=docker/dockerfile:1
FROM node:18-alpine
WORKDIR /app
COPY . .
RUN yarn install --production
CMD ["node", "src/index.js"]
EXPOSE 3000
In terminal (in /app folder, run:
docker build -t getting-started .
Build command uses the Dockerfile to build a new container image.
Docker downloaded a lot of “layers”: you want to start from the node:18-alpine image but, since you didn’t have that on your machine Docker will download it.
Then yarn install your application’s dependencies.
The CMD directive specifies the default command to run when starting a container from this image.
Expose - what port will be used to load app.
-t flag tags your image. Think of this simply as a human-readable name for the final image.
Since you named the image getting-started, you can refer to that image when you run a container.
3. Start an app container
docker run -dp 3000:3000 getting-started
You can stop and remove the container from terminal or VS code.
Share the application
Upload image to docker hub repository
1. Go toDocker Hub (sign in)
Create a repository:
name: getting-started
visibility: public
In VS code terminal, /app folder
2. Login:
docker login -u YOUR-USER-NAME .
3. Use the docker tag command to give the getting-started image a new name. Be sure to swap out YOUR-USER-NAME with your Docker ID
docker tag getting-started YOUR-USER-NAME/getting-started
4. Push (Upload) image to Docker hub (in repository created
docker push YOUR-USER-NAME/getting-started
5. Check, run image on a new instance
Test in Docker playground
Load and sign in: Play with Docker (play-with-docker.com)
Add New instance
Run in terminal:
docker run -dp 3000:3000 YOUR-USER-NAME/getting-started

Click on 3000 ports. Brows should open and app will run.
Close session
Persist the DB
Each container also gets its own “scratch space” to create/update/remove files. Any changes won’t be seen in another container, even if they are using the same image
In terminal (your folder root, not in app - not relevant anyway here)
docker run -d ubuntu bash -c "shuf -i 1-10000 -n 1 -o /data.txt && tail -f /dev/null"
An image will be created from ubuntu and execute:
stuff -i 1-10000 -n 1 -o /data.txt
Generate numbers between 1 and 10000, take maximum ONE (1) and write in /data.txt file. Output discarded.
See data.txt in Docker desktop, VS code and in terminal:
docker exec <container-id> cat /data.txt
Remove container:docker stop <container-id>
docker rm<container-id>
Create a new container (list file when done)
# -i means interactive
# -t mean stty# -itmeans start a container and go stright into container.
# -d means start the container and then detach from it
docker run -it ubuntu ls /
No data.txt filePersist the todo data
By default, the todo app stores its data in a SQLite database at /etc/todos/todo.db in the container’s filesystem
With the database being a single file, if we can persist that file on the host and make it available to the next container, it should be able to pick up where the last one left off.
By creating a volume and attaching (often called “mounting”) it to the directory the data is stored in, we can persist the data.
Share a point in a volume to the container.
1. Create volume
docker volume create todo-db
2. Start the todo app container, but add the --mountoption to specify a volume mount.
We will give the volume a name, and mount it to /etc/todos in the container, which will capture all files created at the path.
docker run -dp 3000:3000 --mount type=volume,src=todo-db,target=/etc/todos getting-started
Load
https://localhost:3000
Add items.
Stop, remove container.
Start again with the same command.
docker run -dp 3000:3000 --mount type=volume,src=todo-db,target=/etc/todos getting-started
Load
https://localhost:3000
Items are there even container was removed.
Data is stored here:
docker volume inspect todo-db
Result:[
{
"CreatedAt": "2023-01-29T02:24:06Z",
"Driver": "local",
"Labels": {},
"Mountpoint": "/var/lib/docker/volumes/todo-db/_data",
"Name": "todo-db",
"Options": {},
"Scope": "local"
}
]
Bind mounts
Share a directory from the host’s filesystem into the container.
When working on an application, you can use a bind mount to mount source code into the container.
The container sees the changes you make to the code immediately, as soon as you save a file. This means that you can run processes in the container that watch for filesystem changes and respond to them.
In this chapter, we’ll see how we can use bind mounts and a tool called nodemonto watch for file changes, and then restart the application automatically.
| . | Named volumes | Bind mounts |
|---|---|---|
| Host location | Docker chooses | You decide |
Mount example (using --mount) | type=volume,src=my-volume,target=/usr/local/data | type=bind,src=/path/to/data,target=/usr/local/data |
| Populates new volume with container contents | Yes | No |
| Supports Volume Drivers | Yes | No |
Trying out bind mounts
VS code terminal - /app folder
Create & start container from ubuntu image, mount current host file system (the /app folder) into corresponding folder in /src subfolder ... app/src
getting-started/app => /src
root@48b82c33f7ea:/# ls
bin boot dev etc home lib lib32 lib64 libx32 media mnt opt proc root run sbin src srv sys tmp usr var
root@48b82c33f7ea:/# cd sr
src/ srv/
root@48b82c33f7ea:/# cd src
root@48b82c33f7ea:/src# ls
Dockerfile package.json spec src yarn.lock
root@48b82c33f7ea:/src# touch myfile.txt
root@48b82c33f7ea:/src# ls
Dockerfile myfile.txt package.json spec src yarn.lock
# myfile.txt exist on local filesystem
# delete it from local file system (host)
root@48b82c33f7ea:/src# ls
Dockerfile package.json spec src yarn.lock
# was deleted from docker container
root@48b82c33f7ea:/src#
exit
PS C:UsersUSERDocumentslocaldevDocker_learnapp>
root@48b82c33f7ea:/src#
exit
PS C:UsersUSERDocumentslocaldevDocker_learnapp>
Run your app in a development container
Make sure you have a fresh copy of getting-started in folder
Co to /app folder
In PowerShellrun
docker run -dp 3000:3000 `
-w /app --mount type=bind,src="$(pwd)",target=/app `
node:18-alpine `
sh -c "yarn install && yarn run dev"
-dp 3000:3000- same as before. Run in detached (background) mode and create a port mapping-w /app- sets the “working directory” or the current directory that the command will run from--mount type=bind,src="$(pwd)",target=/app- bind mount the current directory from the host into the/appdirectory in the containernode:18-alpine- the image to use. Note that this is the base image for our app from the Dockerfilesh -c "yarn install && yarn run dev"- the command. We’re starting a shell usingsh(alpine doesn’t havebash) and runningyarn installto install packages and then runningyarn run devto start the development server. If we look in thepackage.json, we’ll see that thedevscript startsnodemon.
You can watch the logs using
docker logs...app> docker logs -f 90dfac47e8b2
yarn install v1.22.19[1/4] Resolving packages...
[2/4] Fetching packages...
[3/4] Linking dependencies...
[4/4] Building fresh packages...
Done in 59.82s.
yarn run v1.22.19
$ nodemon src/index.js
[nodemon] 2.0.20
[nodemon] to restart at any time, enter `rs`
[nodemon] watching path(s): *.*
[nodemon] watching extensions: js,mjs,json
[nodemon] starting `node src/index.js`
Using sqlite database at /etc/todos/todo.db
Listening on port 3000
nodemonis running and watching any change.
When you’re done watching the logs, exit out by hitting Ctrl+C.
Feel free to make any other changes you’d like to make. Each time you make a change and save a file, the nodemon process restarts the app inside the container automatically. When you’re done, stop the container and build your new image using:
docker build -t getting-started .
Multi container apps
Networking - Allow one container to talk to another.
If twocontainers are on the same network, they can talk to each other. If they aren’t, they can’t.
# Create network
docker network create todo-app
# Start a MySQL container and attach it to the network
docker run -d `
--network todo-app --network-alias mysql `
-v todo-mysql-data:/var/lib/mysql `
-e MYSQL_ROOT_PASSWORD=secret`
-e MYSQL_DATABASE=todos `
mysql:8.0
docker network create todo-app
# Start a MySQL container and attach it to the network
docker run -d `
--network todo-app --network-alias mysql `
-v todo-mysql-data:/var/lib/mysql `
-e MYSQL_ROOT_PASSWORD=secret`
-e MYSQL_DATABASE=todos `
mysql:8.0
Connect to MySQL
docker exec -it a40b6d2feb91 mysql -u root -p
(pass ...see above)Connect to MySQL
If we run another container on the same network, how do we find the container (remember each container has its own IP address)?
To figure it out, we’re going to make use of the nicolaka/netshoot container, which ships with a lot of tools that are useful for troubleshooting or debugging networking issues.
1. Start a new container using the nicolaka/netshoot image. Make sure to connect it to the same network.
docker run -it --network todo-app nicolaka/netshoot

# Mysql is the network alias used when container was created
dig mysql
;; global options: +cmd
;; Got answer:
;; ->>HEADER<<- opcode: QUERY, status: NOERROR, id: 63746
;; flags: qr rd ra; QUERY: 1, ANSWER: 1, AUTHORITY: 0, ADDITIONAL: 0
;; QUESTION SECTION:
;mysql. IN A
;; ANSWER SECTION:
mysql. 600 IN A 172.18.0.2
;; Query time: 10 msec
;; SERVER: 127.0.0.11#53(127.0.0.11) (UDP)
;; WHEN: Sun Jan 29 04:13:04 UTC 2023
;; MSG SIZE rcvd: 44
Docker was able to resolve it to the IP address of the container that had that network alias (remember the --network-alias flag we used earlier?).
Run your app with MySQL
The todo app supports the setting of a few environment variables to specify MySQL connection settings. They are:
- MYSQL_HOST - the hostname for the running MySQL server
- MYSQL_USER - the username to use for the connection
- MYSQL_PASSWORD - the password to use for the connection
- MYSQL_DB - the database to use once connected
In most cases, these secrets are mounted as files in the running container. You’ll see many apps (including the MySQL image and the todo app) also support env vars with a _FILE suffix to point to a file containing the variable.
As an example, setting the MYSQL_PASSWORD_FILE var will cause the app to use the contents of the referenced file as the connection password. Docker doesn’t do anything to support these env vars. Your app will need to know to look for the variable and get the file contents.
1. Note: for MySQL versions 8.0 and higher, make sure to include the following commands in mysql
mysql>ALTER USER 'root' IDENTIFIDE WITH mysql_natve_password BY 'secret'
mysql>flush privileges
docker run -dp 3000:3000 `
-w /app -v "$(pwd):/app" `
--network todo-app `
-e MYSQL_HOST=mysql `
-e MYSQL_USER=root `
-e MYSQL_PASSWORD=secret `
-e MYSQL_DB=todos `
node:18-alpine `
sh -c "yarn install && yarn run dev"
3. If we look at the logs for the container
docker logs -f <container-id>
we should see a message indicating it’s using the mysql database4.Open the app in your browser and add a few items to your todo list.
5. Connect to the mysql database and prove that the items are being written to the database. Remember, the password is secret.
docker exec -it <mysql-container-id> mysql -p todos
Use Docker Compose
Docker Compose is a tool that was developed to help define and share multi-container applications.
1. At the root of the app project, create a file named
docker-compose.yml
# and start with
services:
2. In the compose file, we’ll start off by defining the list of services (or containers) we want to run as part of our application.
First is the app containerIt was created with:
docker run -dp 3000:3000
-w /app -v "$(pwd):/app"
--network todo-app
-e MYSQL_HOST=mysql
-e MYSQL_USER=root
-e MYSQL_PASSWORD=secret
-e MYSQL_DB=todos
node:18-alpine
sh -c "yarn install && yarn run dev"
Then was created:
docker run -d
--network todo-app --network-alias mysql
-v todo-mysql-data:/var/lib/mysql
-e MYSQL_ROOT_PASSWORD=secret
-e MYSQL_DATABASE=todos
mysql:8.0
So, we have
services:
app:
image: node:18-alpine
command: sh -c "yarn install && yarn run dev"
ports:
- 3000:3000
working_dir: /app
# Above coming from -w /app
volumes:
- ./:/app
# Above coming from -v "$(pwd):/app"
environment:
MYSQL_HOST: mysql
MYSQL_USER: root
MYSQL_PASSWORD: secret
MYSQL_DB: todos
# Above coming from:
#-e MYSQL_HOST=mysql
#-e MYSQL_USER=root
#-e MYSQL_PASSWORD=secret
#-e MYSQL_DB=todos
mysql:
image: mysql:8.0
volumes:
- todo-mysql-data:/var/lib/mysql
environment:
MYSQL_ROOT_PASSWORD: secret
MYSQL_DATABASE: todos
#Below have NO IDEEA Yet!!!volumes:
todo-mysql-data:
Run the application stack
You will get 2 running containers.
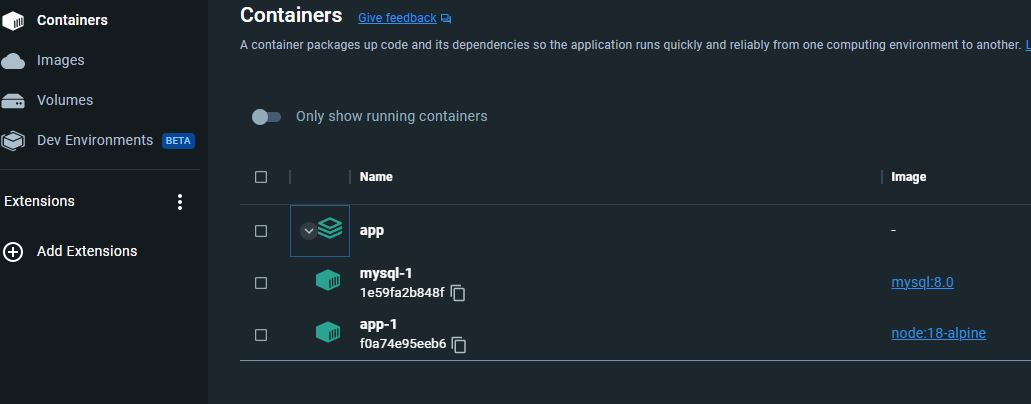
Open:
localhost:3000
App must work
Check Mysql:
docker exec -it 36e1e8b918b2 mysql -p todos
#Then in mysql you will see what just entered in app
use todos';
select * from todo_items;
+--------------------------------------+------+-----------+
| id | name | completed |
+--------------------------------------+------+-----------+
| 972352e4-aa42-412a-bea2-e44a5419451b | 11 | 0 |
| 36b97346-2761-4b4e-a835-24a9b7767cec | 22 | 0 |
| bd05ef47-1033-468a-888e-65c79ed5ae64 | 33 | 0 |
+--------------------------------------+------+-----------+
3 rows in set (0.00 sec)
Removing Volumes
By default, named volumes in your compose file are NOT removed when running docker compose down. If you want to remove the volumes, you will need to add the --volumes flag.
The Docker Dashboard does not remove volumes when you delete the app stack.
By default, named volumes in your compose file are NOT removed when running docker compose down. If you want to remove the volumes, you will need to add the --volumes flag.
The Docker Dashboard does not remove volumes when you delete the app stack.
Image-building best practices
Security scan
docker scan mysql
Tested 3 dependencies for known vulnerabilities, no vulnerable paths found.
For more free scans that keep your images secure, sign up to Snyk at https://dockr.ly/3ePqVcp
Image layering
Using the docker image history command, you can see the command that was used to create each layer within an image.
docker image history mysql
#or
docker image --no-trunc history mysql
Image layering
# Shows all layers of an image (how was built)
# Use --no-trunc to see all detailsdocker image history
Layer caching
Each command in the Dockerfile becomes a new layer in the image.
You might remember that when we made a change to the image, the yarn dependencies had to be reinstalled
To fix this, we need to restructure our Dockerfile to help support the caching of the dependencies. For Node-based applications, those dependencies are defined in the package.json file. So, what if we copied only that file in first, install the dependencies, and then copy in everything else? Then, we only recreate the yarn dependencies if there was a change to the package.json.
From this (bad)
# syntax=docker/dockerfile:1
FROM node:18-alpine
WORKDIR /app
COPY . .
RUN yarn install --production
CMD ["node", "src/index.js"]
FROM node:18-alpine
WORKDIR /app
COPY . .
RUN yarn install --production
CMD ["node", "src/index.js"]
To this:
# syntax=docker/dockerfile:1
FROM node:18-alpine
WORKDIR /app
COPY package.json yarn.lock ./
RUN yarn install --production
COPY . .
CMD ["node", "src/index.js"]
FROM node:18-alpine
WORKDIR /app
COPY package.json yarn.lock ./
RUN yarn install --production
COPY . .
CMD ["node", "src/index.js"]
Create a file named .dockerignore in the same folder as the Dockerfile with the following contents.
Example:
# comment
*/temp*
*/*/temp*
temp?
Rebuilding images -> system use cache
Multi-stage builds
Incredibly powerful tool to help use multiple stages to create an image.
- Separate build-time dependencies from runtime dependencies
- Reduce overall image size by shipping only what your app needs to run
When building React applications, we need a Node environment to compile the JS code (typically JSX), SASS stylesheets, and more into static HTML, JS, and CSS.
If we aren’t doing server-side rendering, we don’t even need a Node environment for our production build. So, ship the static resources in a static nginx container.
# syntax=docker/dockerfile:1
FROM node:18 AS build
WORKDIR /app
COPY package* yarn.lock ./
RUN yarn install
COPY public ./public
COPY src ./src
RUN yarn run build
FROM nginx:alpine
COPY --from=build /app/build /usr/share/nginx/html
FROM node:18 AS build
WORKDIR /app
COPY package* yarn.lock ./
RUN yarn install
COPY public ./public
COPY src ./src
RUN yarn run build
FROM nginx:alpine
COPY --from=build /app/build /usr/share/nginx/html
References:
Overview | Docker Documentation
Reference documentation | Docker Documentation
Vulnerability scanning for Docker local images | Docker Documentation
nodemon - npm (npmjs.com)